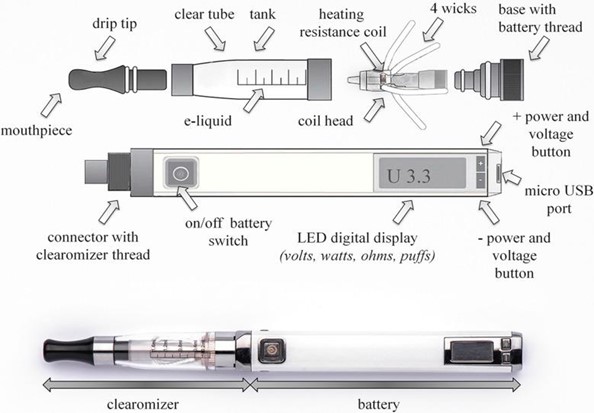
A vape or an e-cigarette is an electronic smoking device that contains tobacco. It works on a power source battery, an atomizer, and a tank-like cartridge container. In vaping, consumers inhale vapor rather than smoke.
An atomizer atomizes a liquid solution. It is a heating element responsible for drawing liquid onto the coil of the vape. Overall, it is an element of a vape that requires repair or replacement once damaged.
The reasons why atomizers stop working can be numerous. It also depends on the quality of making, material, and manufacturer. Other factors like daily consumption, acidity level, PG/VG content, and high-power setting determine the lifespan of you vape.
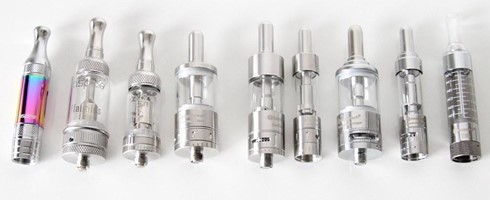
Types of Atomizers
Let’s understand the different types of atomizers:
As discussed above, the quality of make and materials used are responsible factors to estimate a vape’s longevity. These include:
- Wicked Wax Atomizers
- Wickless Atomizers
- Ceramic Dishes
1. Wicked Wax Atomizers:

Wicked wax atomizers are fit for vapes of low viscosity oil and wax. These have a coil surrounded, wrapped, or threaded with cotton. These are small, sensitive, and difficult to clean atomizers that tend to get dirty fast. These reasons lead to replacing wicked wax atomizers regularly, even if the cotton threading is available in a single coil or double coil.
2. Wickless Atomizers:
Wickless atomizers are installed when all the components of the vape body are thicker in nature. These last longer comparatively, are easy to clean, and don’t dirt up fast. Wickless Atomizers are available in both ceramic or quartz rods with single or triple coiling.
3. Ceramic Dishes:
These types of atomizers don’t have heating coils. The reason behind their durability is the absence of heating coils. There is no need to clean ceramic dish atomizers but require proper maintenance.
Common Issues with Atomizers
Now that we understood different types of atomizers, let’s understand the problems regarding them:
Users often face the issue indicating that no atomizer or check atomizer on them vape. It happens at some point with mostly all vapes. But, as big of a problem it may seem, fixing it is just easy.
When you’re unable to vape even after pressing the firing button, it means that the vape mod is not reading or recognizing the coil. The atomizer head must be detected by the vape mod to function systematically. Once the connection is proper, power gets delivered to the threaded coil, which heats, allowing the users to vape.
Possible Fixes to the Issues
Check atomizer or no atomizer issue arises when the above condition doesn’t meet. There are some easy to fix solutions available to overcome this situation. These include:
1. Check with Alternate Tank or Mod:
To understand where the ‘check atomizer‘ issue exactly is, changing the vape mod or tank is the first step one must implement. If you have an alternate or other vape available, try using its tank and mod.
A vape tank is generally easy to remove and attach. If that vape or e-cig still shows the same message, it means that the problem lies in the vape mod.
Now try adding another vape tank or your damaged mod. If the flash warning is the same, it means that the issue lies in you vape.
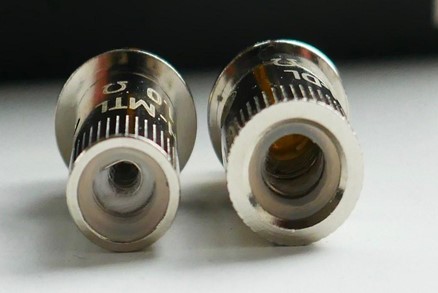
2. Check the Atomizer Coil:
Check whether the atomizer head is attached or screwed in as it should be. To ensure that it is, remove the tank carefully without leaking the fluid. See if the coil is perfectly fit or screwed at the base of the tank. Unscrew and screw again to avoid cross-threading. Now check the status of you vape by connecting the tank to the mod. If the message still says ‘check atomizer,’ it is time to get it replaced.
3. Check If the Coil Is Aged
Coils are prone to damage because they are not suitable for lifelong use. They tend to damage after prolonged usage. It also depends on the maintenance. If it is kept in proper shape, meaning that it is cleaned regularly, the chances of damage are less likely. The power of usage, vape juice, and coil resistance also matters.
If the coil is dirty and all gunked up, the heat might not reach the atomizer head to keep it working. At times like these, too, a check atomizer message is thrown.
Clean Atomizers to Avoid Issues
For cleaning atomizers, especially wicked, wax atomizer heads, apply the following ways:
1. Q-tip and alcohol:
Isopropyl alcohol or rubbing alcohol is applied on q-tips to clean atomizer coils. These are sensitive and delicate and need cleaning with utmost care. Try removing maximum gunk by wiping the q-tip that was earlier dipped in alcohol on the coil surface. Ensure that the coil doesn’t bend out of its shape to reduce further damage.
2. Paperclip:
Use a paperclip to remove the clogged airflow and gunk that traps the passage of heat. Simply inserting the paperclip end wrapped with a paper towel in the air holes clears the gunk. But extra precautions need to be taken to avoid damage as paperclips can poke the sensitive coil.
If the wax is accumulated at an unwanted area of the vape, simply burning it off can solve the problem before you actually go ahead and cost a replacement. Dry burning the atomizer head until it glows red is a simple technique to get rid of the wax. In case there is any residue remaining, use a q-tip to scoop it out.
3. Blow Air:
Another easy-to-implement technique to clean the atomizer is blowing air into it. It sounds like a hack, right? Sometimes the possible hacks are the best solutions. Blowing air into the clogged airflow can clear and clean the path to making it working again. The only instruction to follow here includes that the vape must be at room temperature or cooled down before blowing human air into it. Otherwise, it will leave a skin burn.
4. Soak the Atomizer:
Dipping or submerging the atomizer in a bowl filled with warm or hot water and rubbing alcohol removes the hard gunk. Leaving this bowl undisturbed for a few hours cleans even the stickiest gunk. Clean the residue using a q-tip. Once done, let the atomizer dry completely before attaching it to the mod.
Despite getting the no atomizer or check atomizer message, users tend to ignore it to an extent till when it actually stops heating the coil and transforming smoke. If users experience burnt or horrible taste, leakage, gunk-build up, and clogged airflow, it is high time that the atomizer requires replacement.
If either of the other options is not applicable to fix the problem, replacing the coil is the best option.
Conclusion:
As discussed above, there is not one but many ways to fix the check atomizer/no atomizer message. One can apply the three natural techniques: air, fire, and water. If these hacks don’t work, try attaching the atomizer on another vape to understand where the issue actually lies.
Moreover, if the coil has aged, one can go on and replace it to avoid the trouble of implementing hacks. But, before following any ways to solve the issue, users should first keep in mind the type of atomizer they need to deal with.
Screwing the vape tank and vape mod right but not too tight is also a possible fix to the check atomizer issue. And when none of these works, taking a professional’s help is always the best solution.